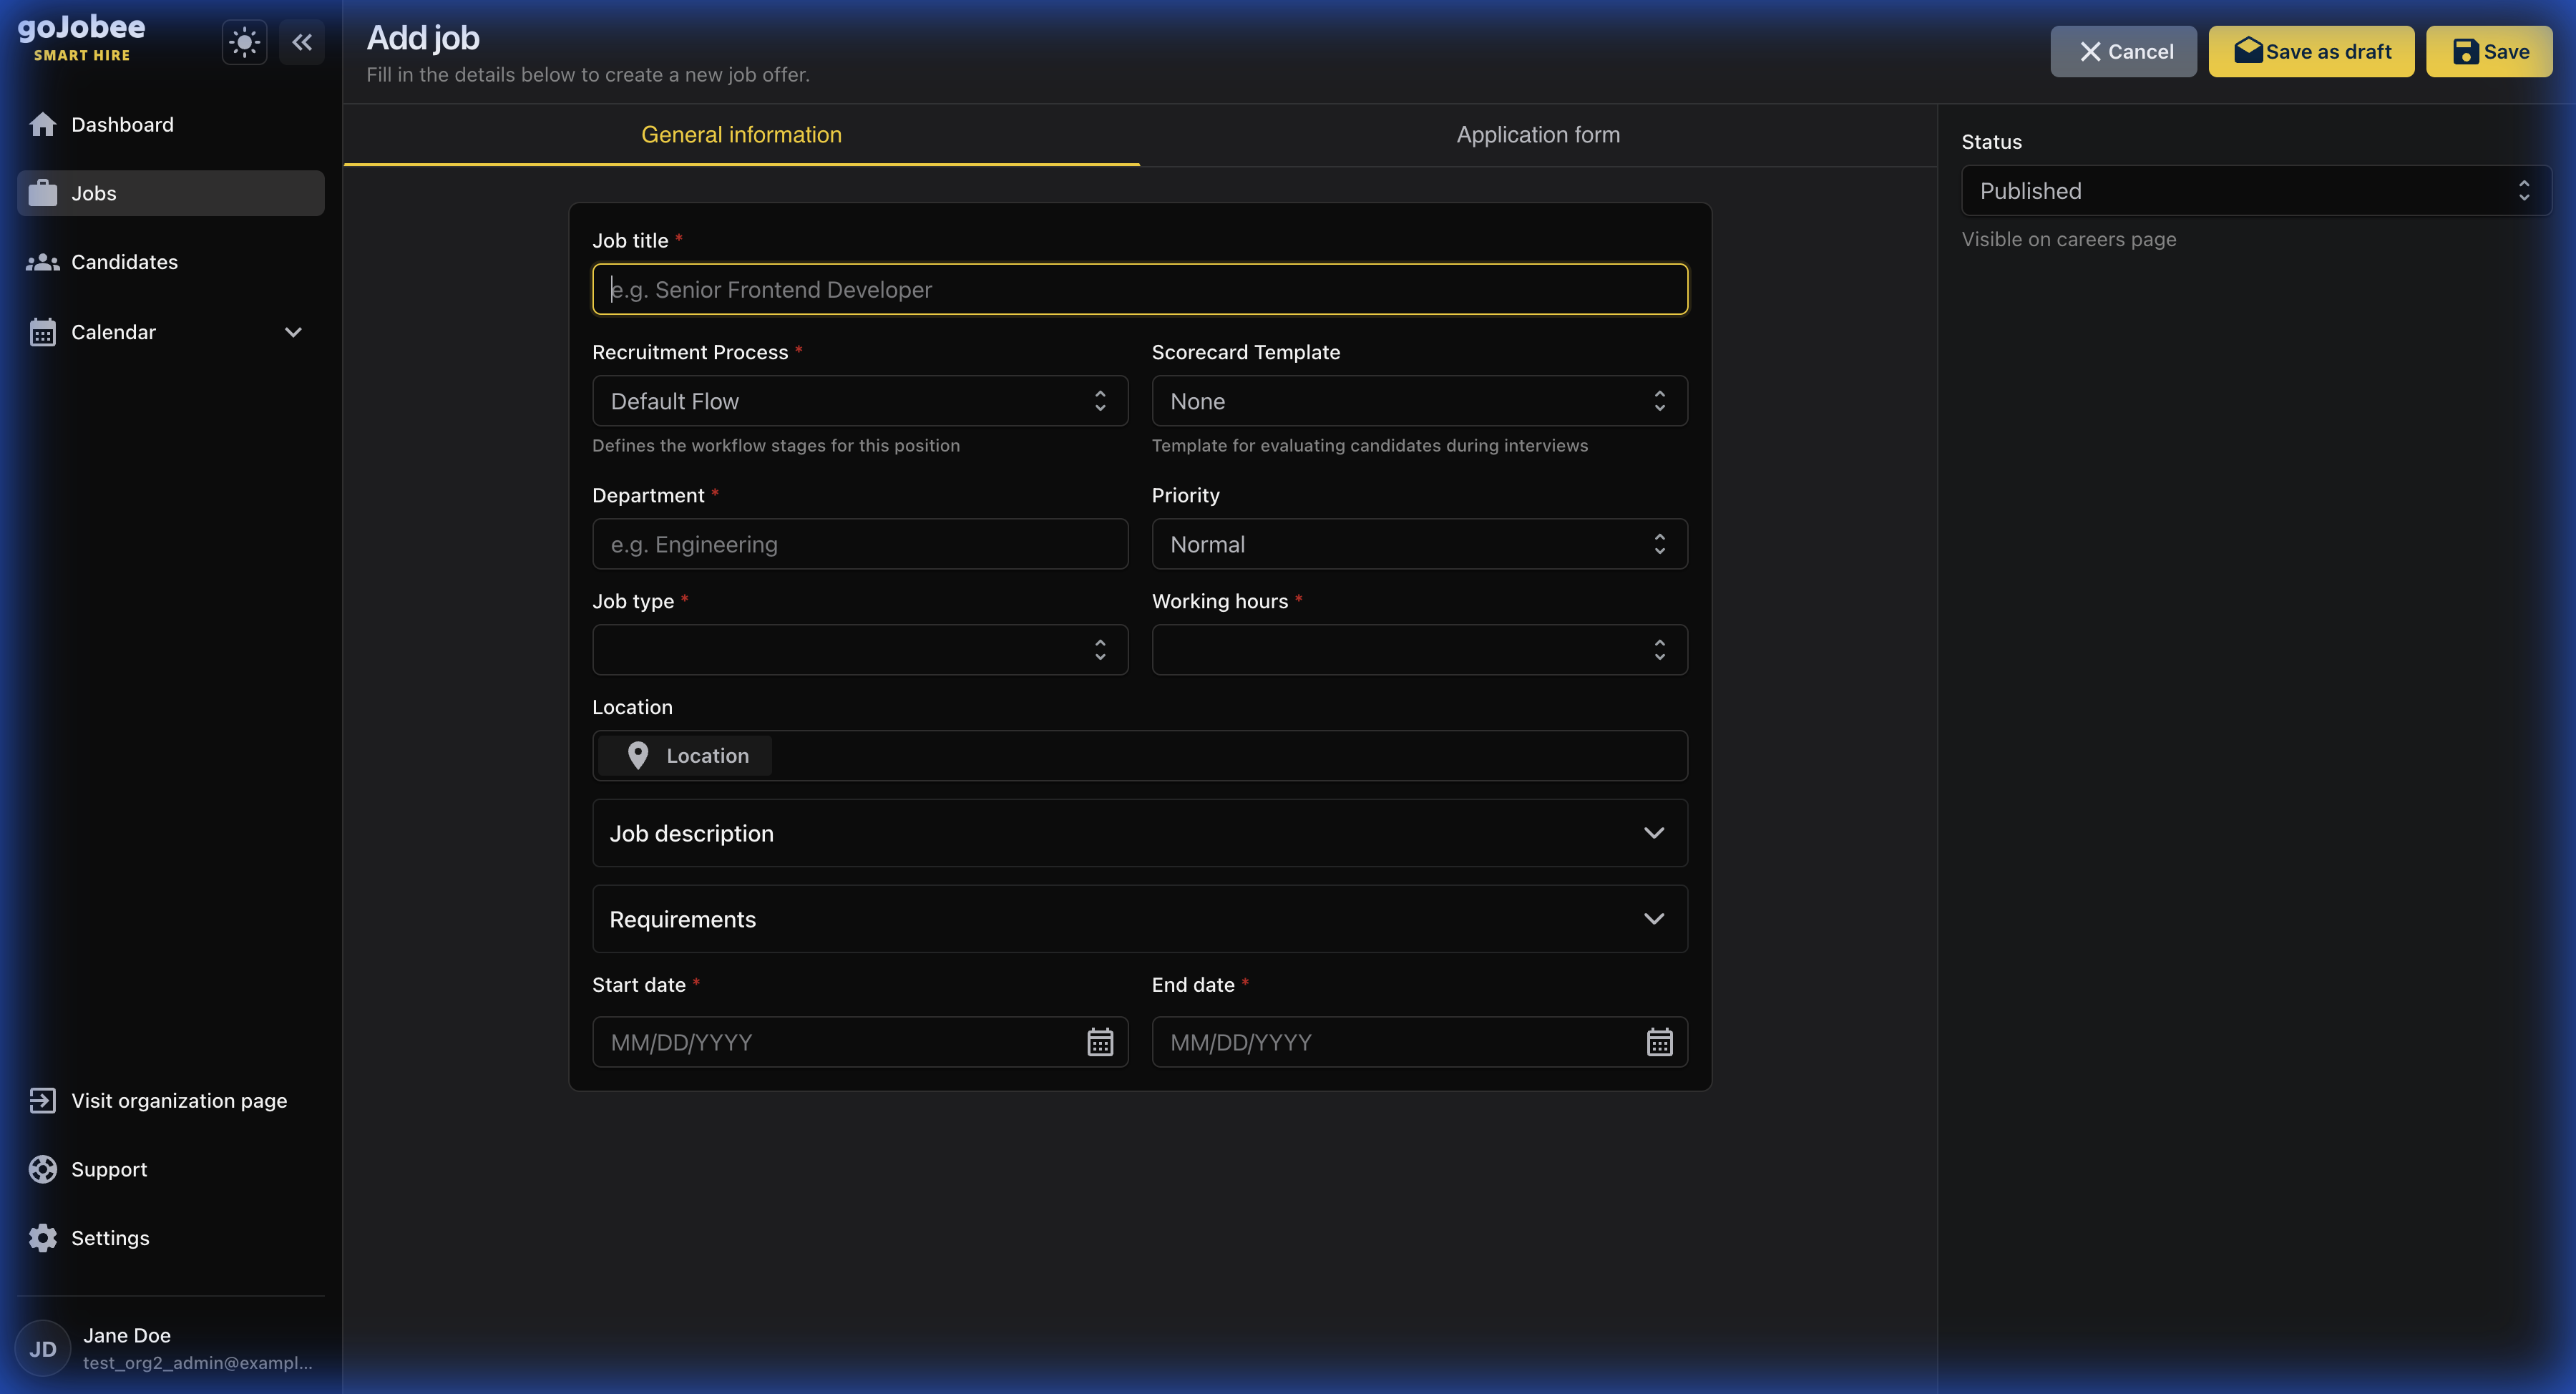
This tab contains all the basic details about the position. The form shows fields for job title, recruitment process, department, and more.
Understanding the Job Creation Form
A complete guide to all fields and options when creating a new job posting.
The job creation form in GoJobee is divided into two main tabs: General Information and Application Form. This guide explains every field to help you create effective job postings.
1
General Information Tab Overview
2
Job Title (Required)
Enter the position title that will be visible to candidates. Use clear, searchable titles like 'Senior Frontend Developer' or 'Marketing Manager'. Avoid internal jargon or abbreviations.
Job titles with seniority level (Junior, Mid, Senior) attract more relevant candidates.
3
Recruitment Process (Required)
Select the hiring pipeline for this position. 'Default Flow' uses your organization's standard stages. You can create custom processes in Settings > Pipeline for different role types (e.g., technical vs. sales hiring).
4
Scorecard Template
Choose an evaluation scorecard to assess candidates consistently. Scorecards define criteria (skills, culture fit, experience) that interviewers rate. Select 'None' if you don't need structured evaluations.
Using scorecards improves hiring decisions by reducing bias and ensuring fair comparison.
5
Department (Required)
Specify which team or department this role belongs to (e.g., Engineering, Marketing, Sales, Operations). This helps organize your job listings and filter candidates.
6
Priority
Set the urgency level for this position: Normal, High, or Critical. High priority jobs appear at the top of your team's dashboard and can trigger faster notification rules.
7
Job Type (Required)
Select the employment type: Full-time, Part-time, Contract, Internship, or Freelance. This is displayed prominently on your career page to set correct expectations.
8
Working Hours (Required)
Specify the schedule: Standard (9-5), Flexible, Shift-based, or Custom. In today's remote-friendly world, this is an important factor for candidates.
9
Location
Click the location button to specify where the role is based. You can select: On-site (with city/address), Remote, Hybrid, or multiple locations. Use the map to set precise coordinates for on-site positions.
10
Job Description
Expand this section to write a detailed description of the role. Include: company overview, team structure, key responsibilities, projects they'll work on, and why this role matters. Use rich formatting (headings, bullets, links) for readability.
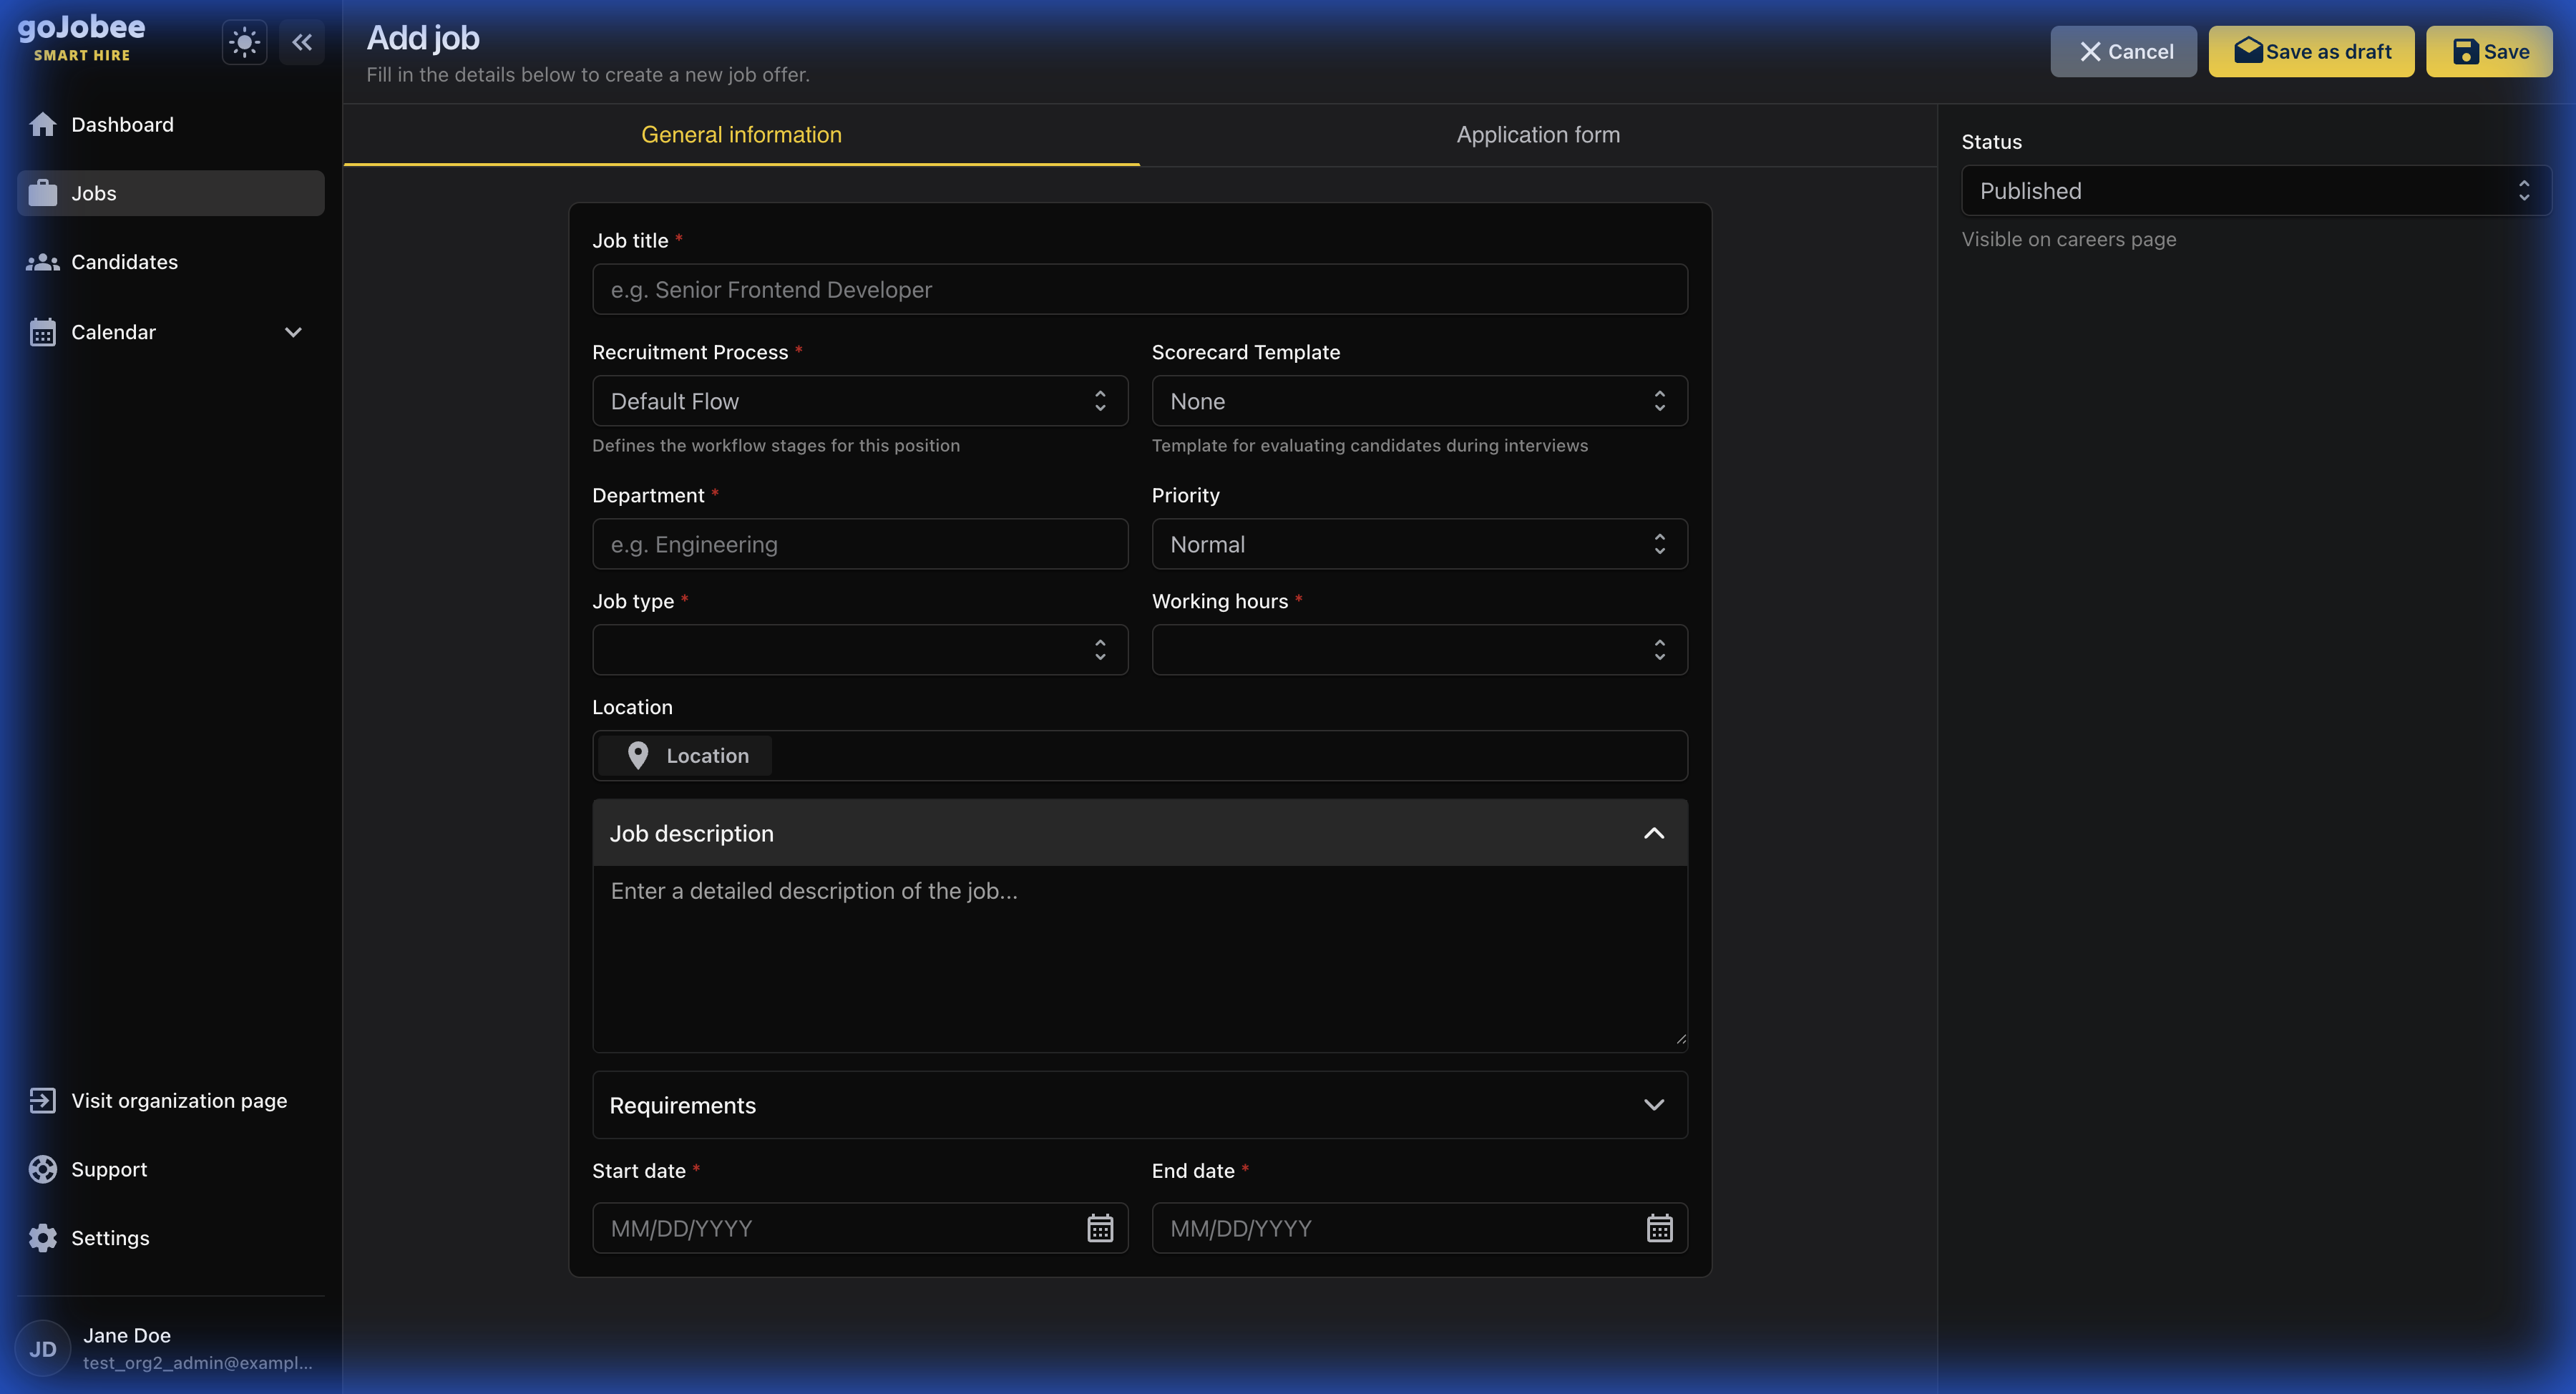
Descriptions with 700-2000 words perform best. Too short seems unprofessional; too long loses attention.
11
Requirements
Expand this section to list qualifications and skills. Include: required experience, technical skills, certifications, soft skills, and 'nice to have' qualifications. Be realistic to avoid discouraging qualified candidates.

Studies show women apply to jobs only when they meet 100% of requirements, while men apply at 60%. Consider marking requirements as 'Required' vs 'Preferred'.
12
Start Date & End Date
Start Date is when you want the new hire to begin. End Date sets when applications close. Leave End Date empty for evergreen positions that recruit continuously.
13
Status Panel
On the right side, you'll see the Status selector. Choose: Published (visible on career page), Internal (visible only to your team), Draft (work in progress), or Archived (closed/hidden).
14
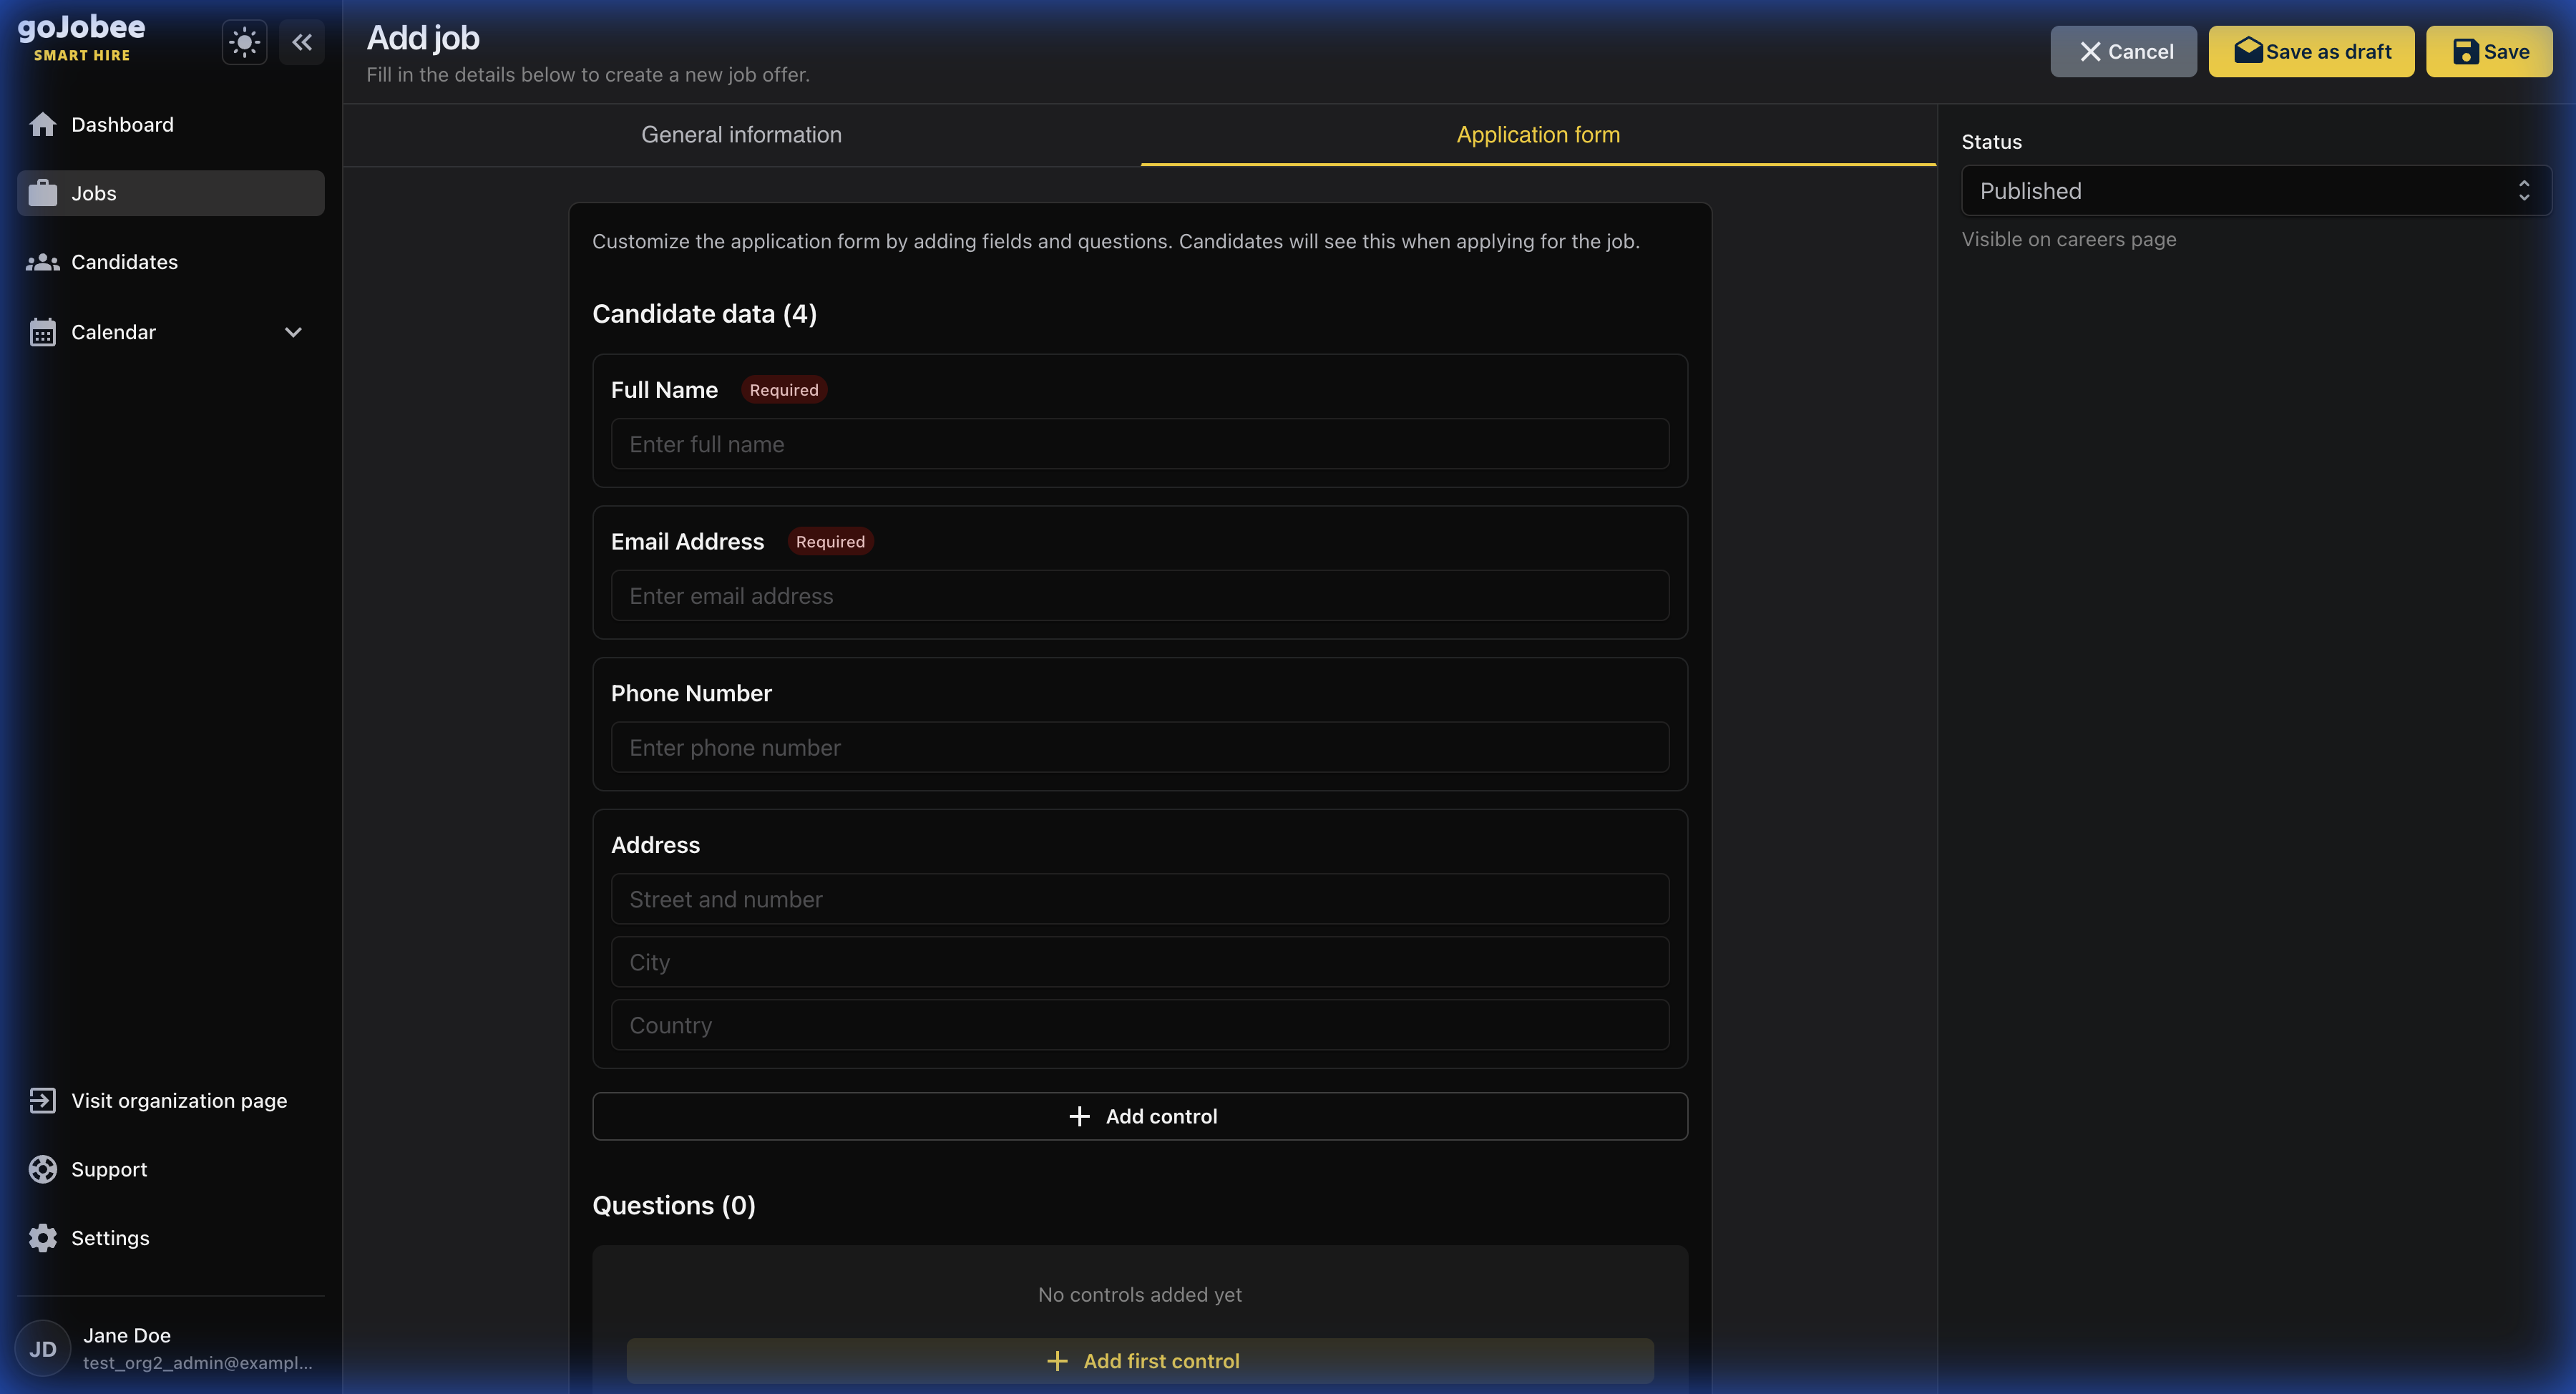
Application Form Tab
Switch to this tab to customize what information you collect from applicants. This determines the application experience for candidates.
15
Candidate Data Fields
By default, you collect: Full Name (required), Email Address (required), Phone Number (optional), and Address with Street, City, Country (optional). Click '+ Add control' to add more fields like CV upload, Cover Letter, Portfolio URL, or LinkedIn profile.
16
Custom Questions
Add screening questions to filter candidates early. Click '+ Add first control' to choose question types.
17
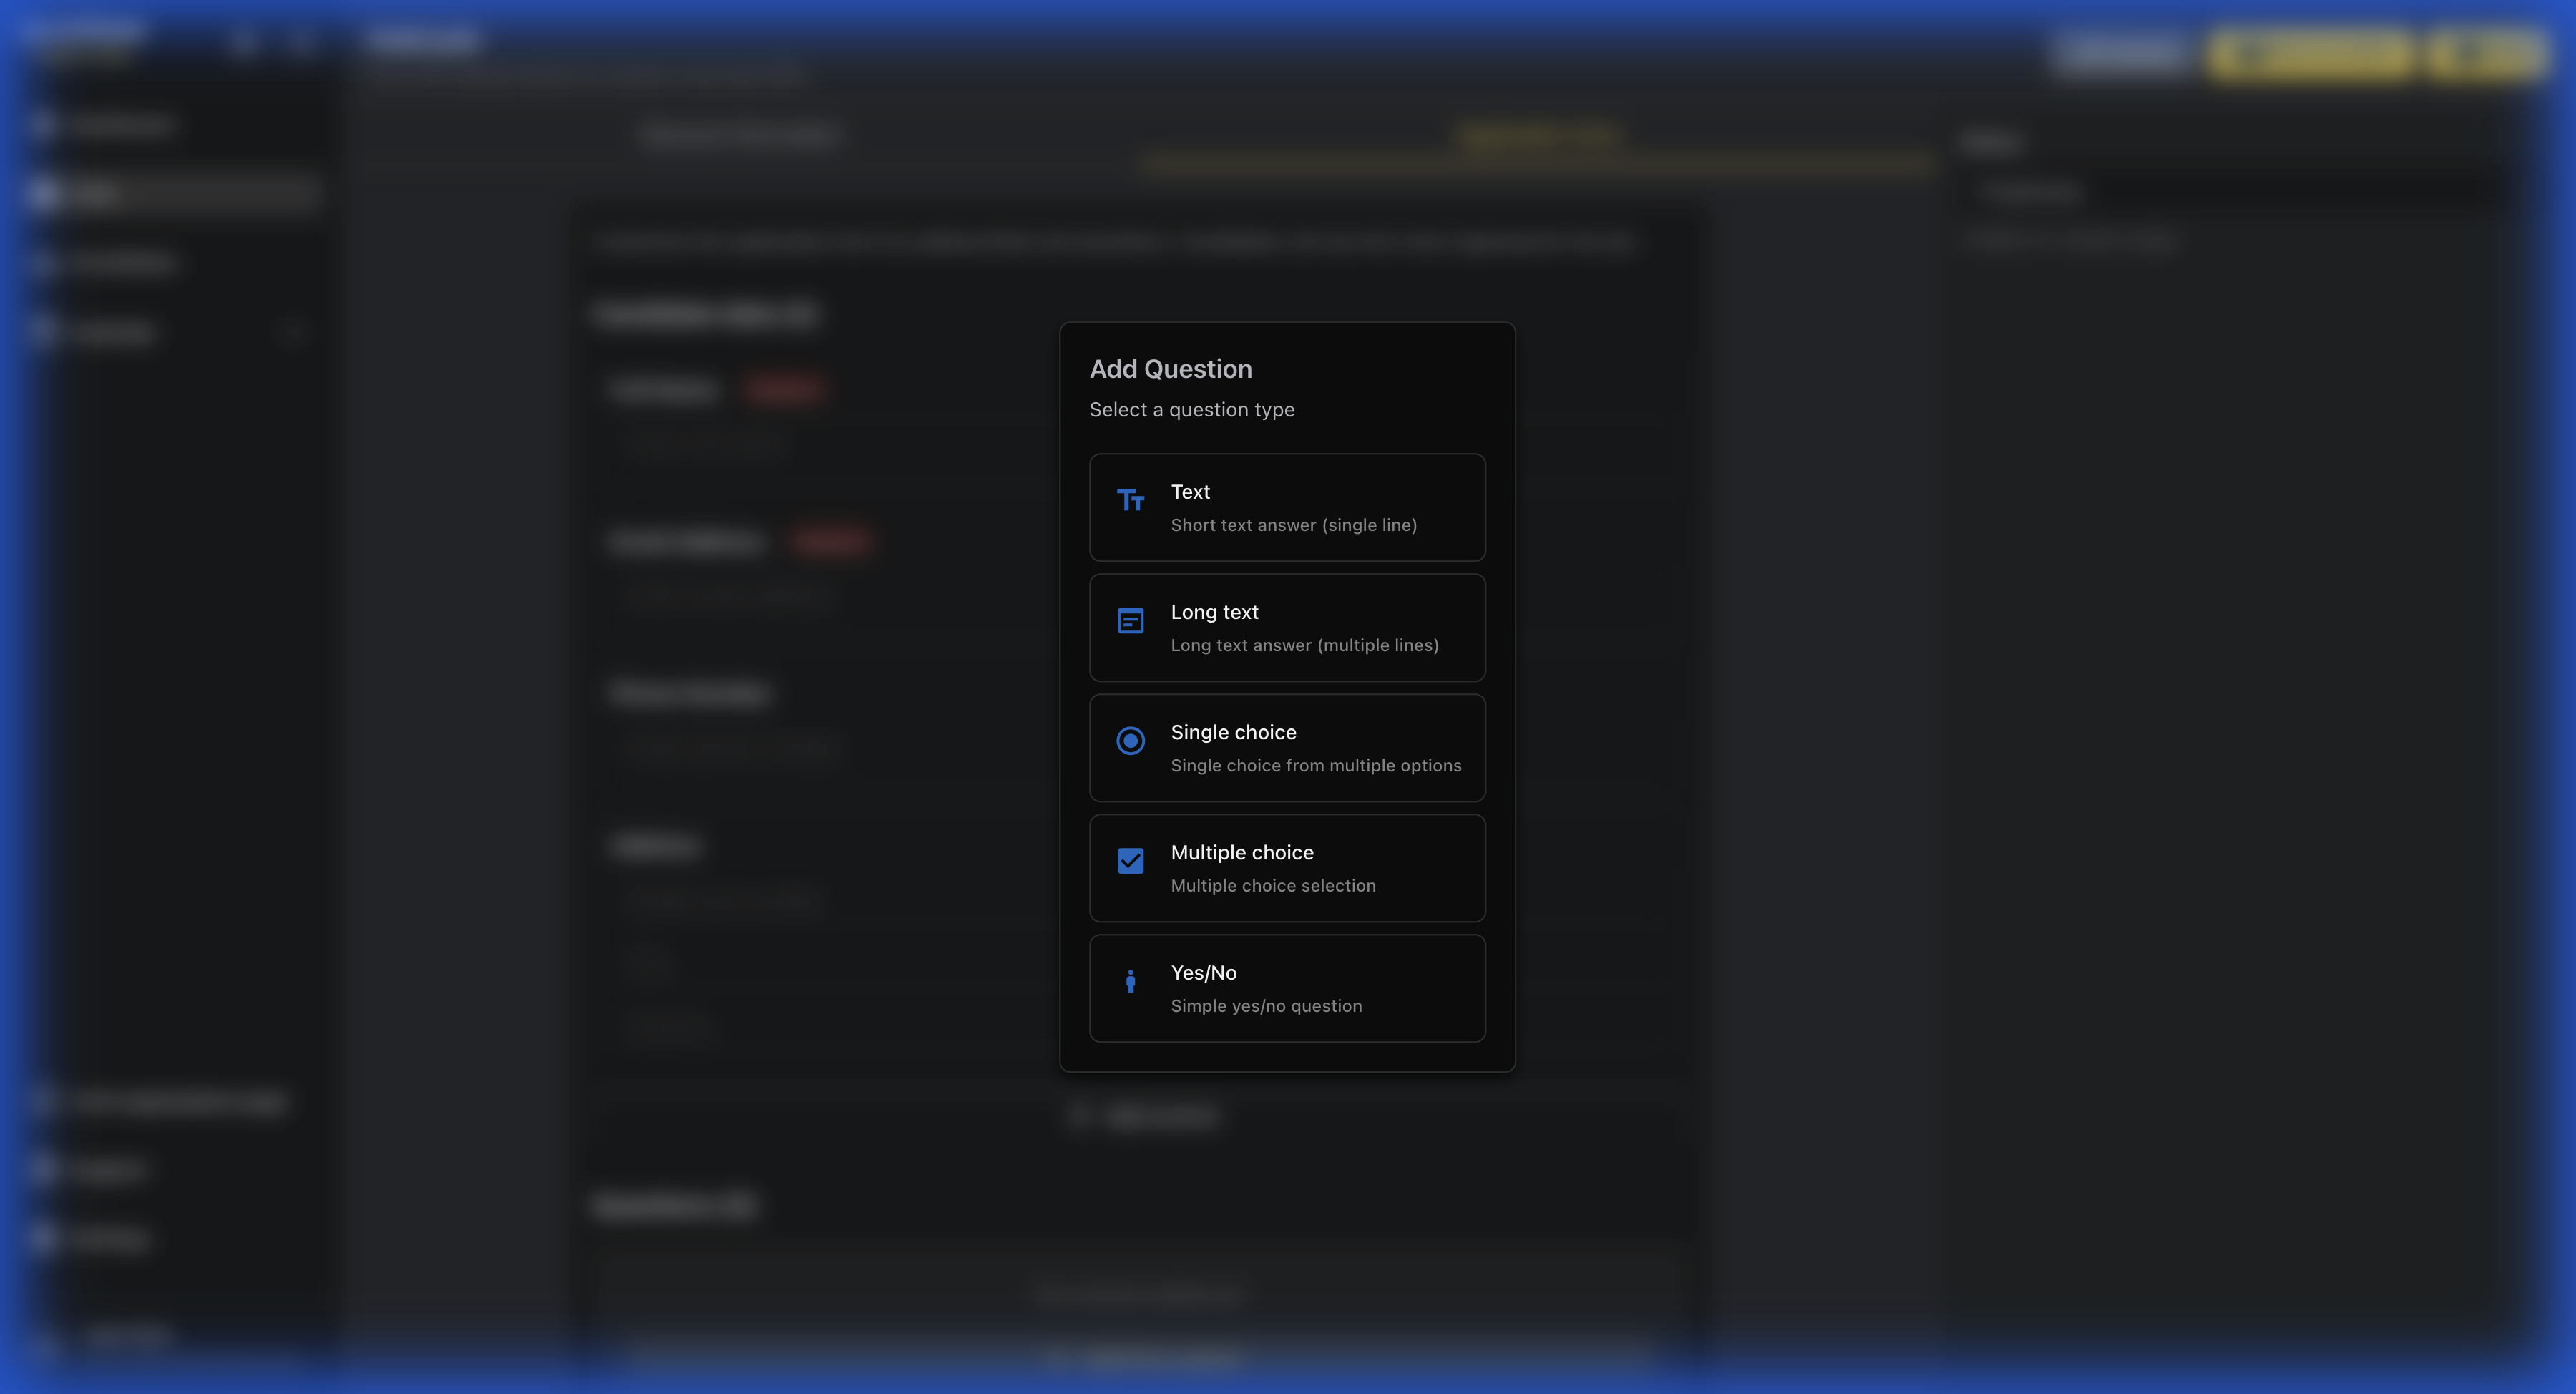
Question Types Explained
Text: Short answer for names, links. Long text: Detailed responses (motivation letter). Single choice: Pick one option (yes/no, experience level). Multiple choice: Select multiple options (skills, availability). Yes/No: Simple binary questions.
Add 1-3 carefully chosen questions. Too many questions reduce application completion rates.
18
Saving Your Job
At the top right, you have three options: Cancel (discard changes), Save as draft (save without publishing), or Save (save and apply current status). Drafts can be completed later without losing progress.
You now understand every field in the job creation form! Well-structured job postings with clear descriptions and reasonable requirements attract better candidates.