Click on 'Settings' in the left sidebar at the bottom of the navigation menu.
Email Templates
Create and manage email templates for automated and manual candidate communication.
Email templates help you communicate professionally and consistently with candidates. You can create templates for various purposes like interview invitations, rejection notices, and offer letters.
1
Go to Settings
2
Open the Email Templates tab
Click on the 'Email Templates' tab to manage your email communication templates.
3
View existing templates
You'll see a table with all email templates showing Name, Subject, and Type. The Type indicates whether the template is for automated or manual use.
4
Create a new template
Click the yellow 'New Template' button in the top right corner to create a new email template.
5
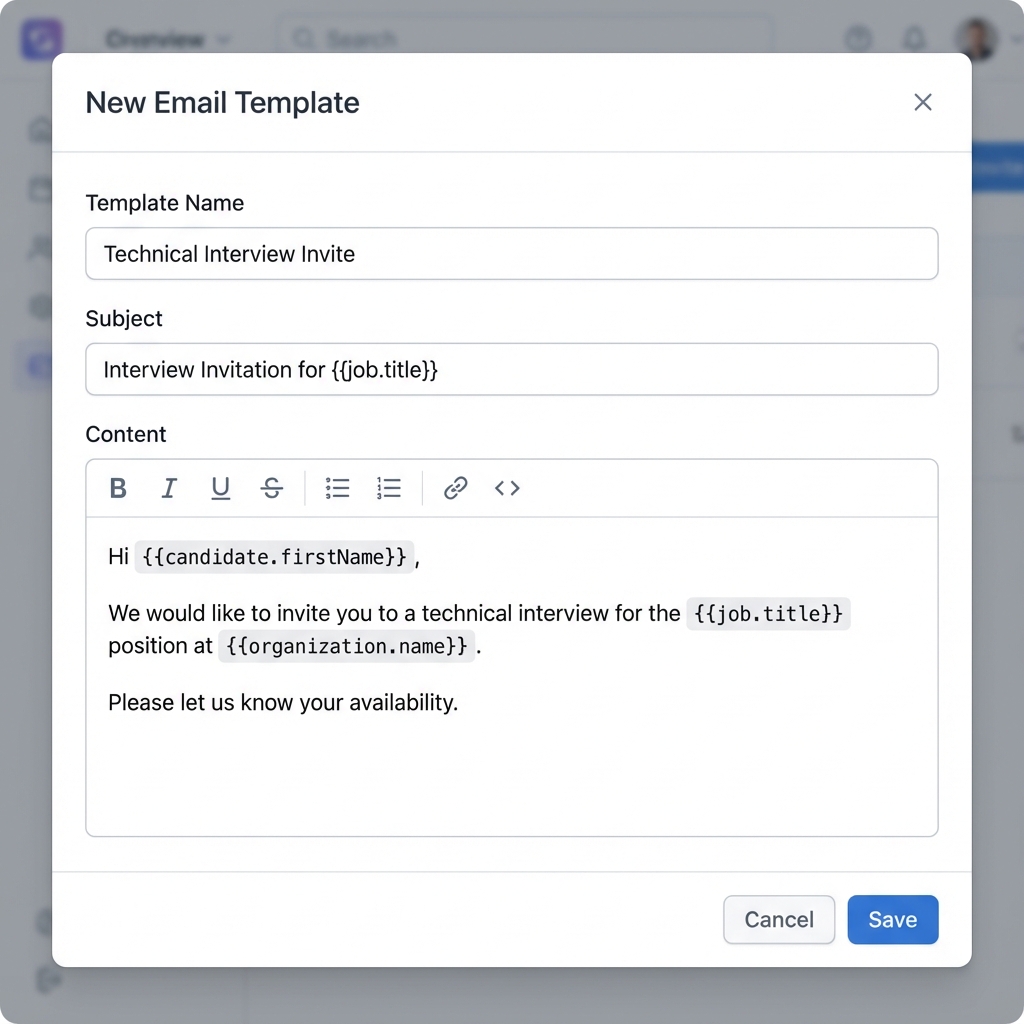
Set template details
Enter a template name (for internal reference), subject line, and select the template type (automated or manual).
6
Write the email body
The template editor supports dynamic variables that are automatically replaced with real data when sending the message. To use a variable, insert it into the subject or body in the format `{{variable.name}}`.
Full list of available variables:
Candidate Details:
- `{{candidate.firstName}}` – Candidate's first name
- `{{candidate.lastName}}` – Candidate's last name
- `{{candidate.name}}` – Full name
- `{{candidate.email}}` – Candidate's email address
- `{{candidate.phone}}` – Phone number
Job Details:
- `{{job.title}}` – Job title
- `{{job.department}}` – Department
- `{{job.location}}` – Office location
Organization Details:
- `{{organization.name}}` – Your company name
- `{{organization.website}}` – Company website
Interview Details:
- `{{interview.date}}` – Meeting date
- `{{interview.time}}` – Meeting time
- `{{interview.duration}}` – Duration (in minutes)
- `{{interview.videoLink}}` – Online meeting link (e.g., Google Meet)
- `{{interview.type}}` – Meeting type (Online/In-person)
Stage Details:
- `{{stage.name}}` – Name of the current stage
- `{{stage.previousName}}` – Name of the previous stage
General:
- `{{recruiterName}}` – Name of the sender/recruiter
- `{{currentDate}}` – Current date
You can quickly add a variable by clicking the 'Insert Variable' button in the editor toolbar or inside the subject line field.
7
Use dynamic variables
Insert placeholders that will be replaced with actual data when the email is sent. Common variables include candidate name, job title, interview date/time, and interviewer names.
8
Save and test
Click 'Save' to store your template. Consider sending a test email to yourself to verify the formatting and variable substitution.
Always proofread your templates carefully - they represent your company to candidates.
Well-crafted email templates save time and ensure consistent, professional communication with all candidates throughout the hiring process.